¶ Object Manager
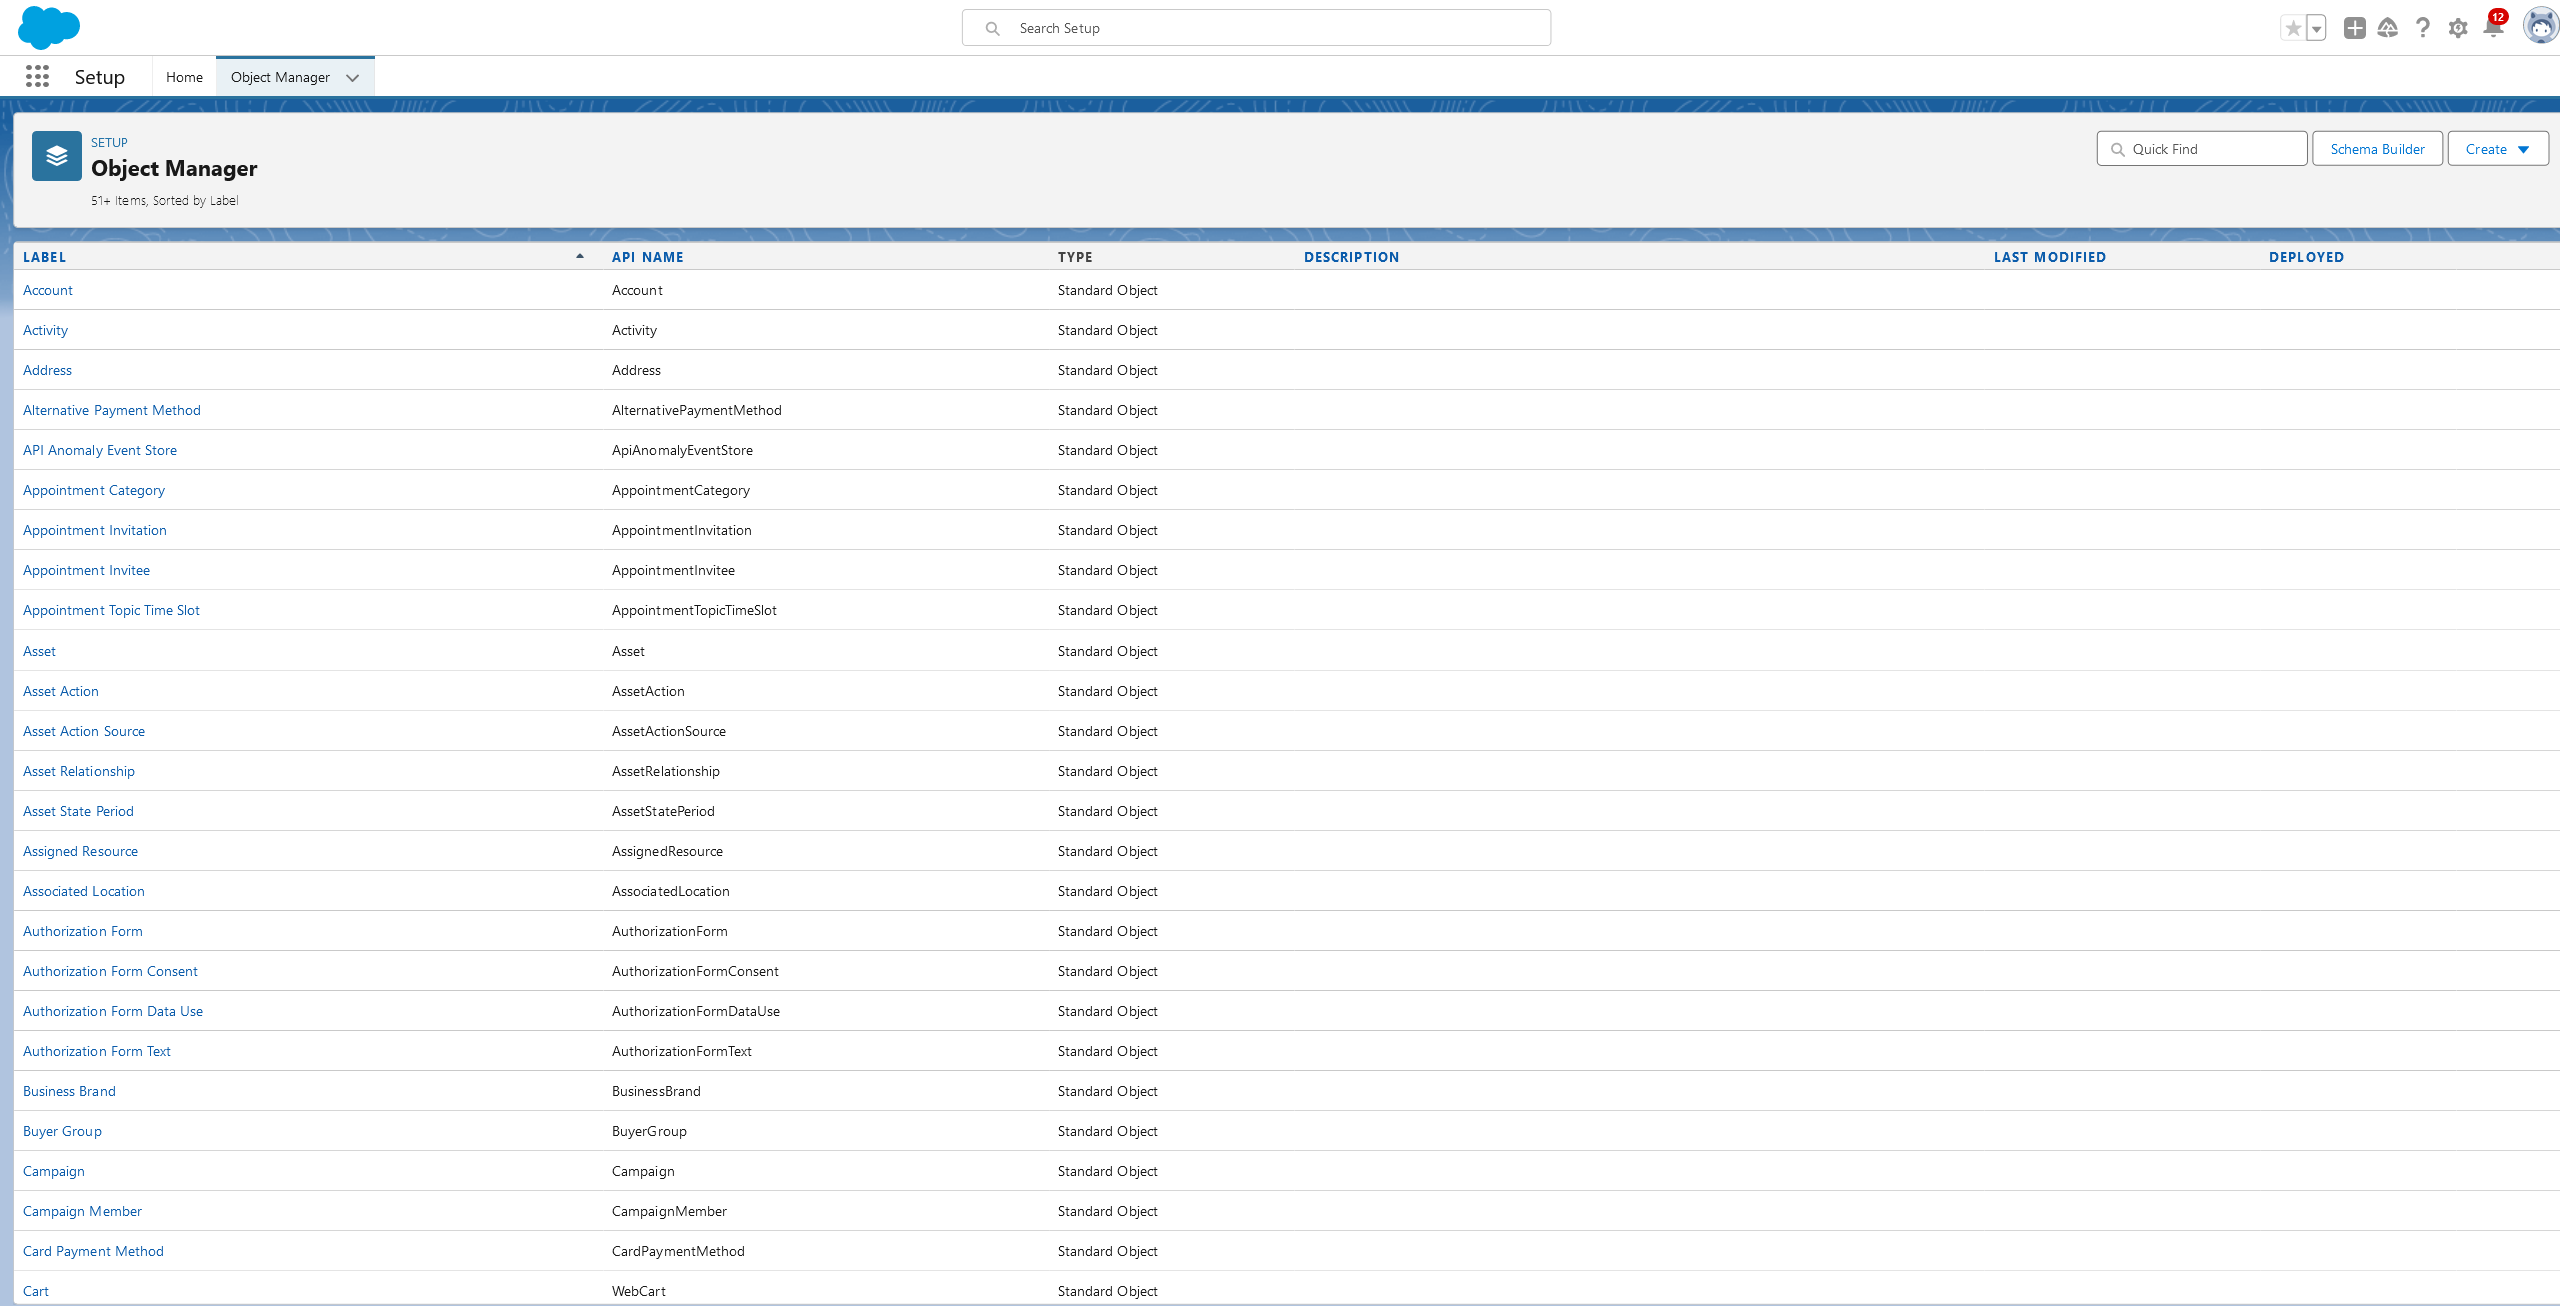
- The Object Manager provides a view of all objects within the organization, both standard and custom.
- Within each object there are:
- Page layouts (or user views) - The default views that a user would see when viewing a record of a particular object. These are just labels and values on a view.
- Record Lightning Pages - Customized views that go well beyond the capabilites of page layouts
- Fields and Relationships
- Automation acting on the object
- Flows
- Apex Triggers
¶ Create a New Object
Click the Create button and select Custom Object on the top right of the table or click the Object Manager tab and select New Object.
There are several object definititions that you must specify for every custom object:
- Label: This is what users see in the Salesforce interface, like on record detail pages, search results, and list views. It should be clear and user-friendly
- Plural Label: The name of the object pluralized (Ex: objects)
- Object Name: This is the technical name used internally by Salesforce and for programming with tools like Apex. It can be the same as the label, but it allows for using special characters or abbreviations that wouldn't be ideal for users to see. By default, the Object Name will add an underscore (_) between spaces in the Label.
- Record Name: The label for the identifier of each record in your object type. This identifier will be what is used in lookup lists and search results. Generally it's a name or number depending on the type of object. Example: User Name, or Account Number.
- Data Type: The type of data that the Record Name accepts.
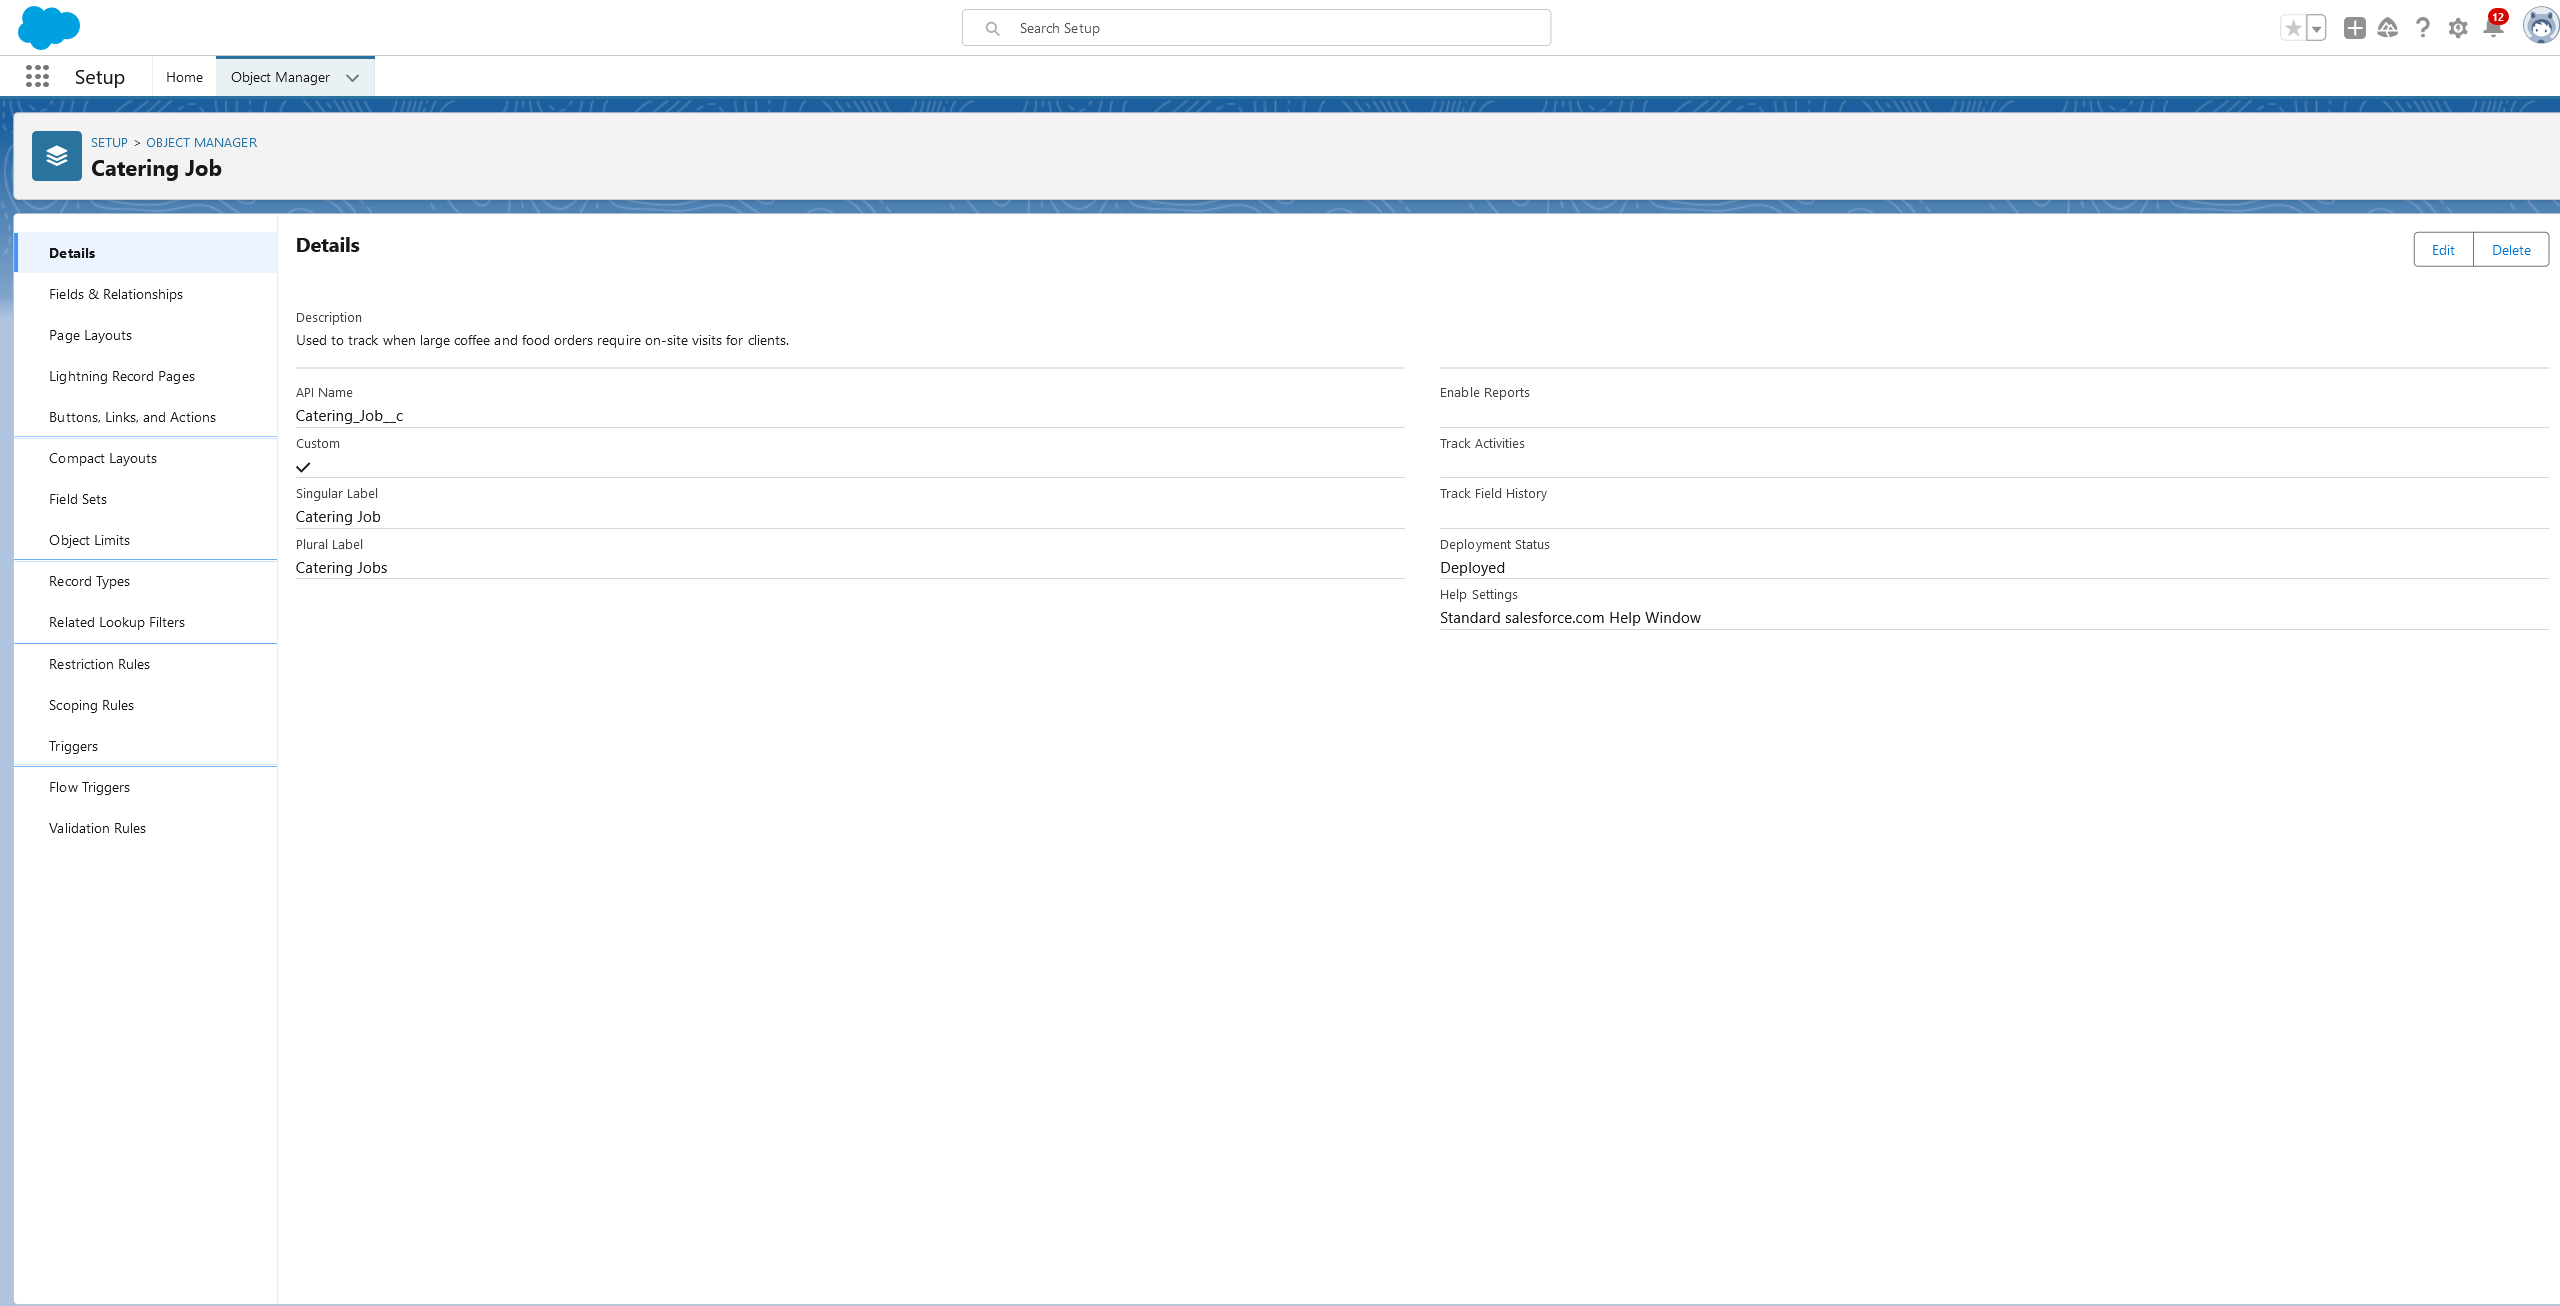
¶ Object Configuration
Click on any object within the Object Manager to get to its configuration.
¶ Fields and Relationships
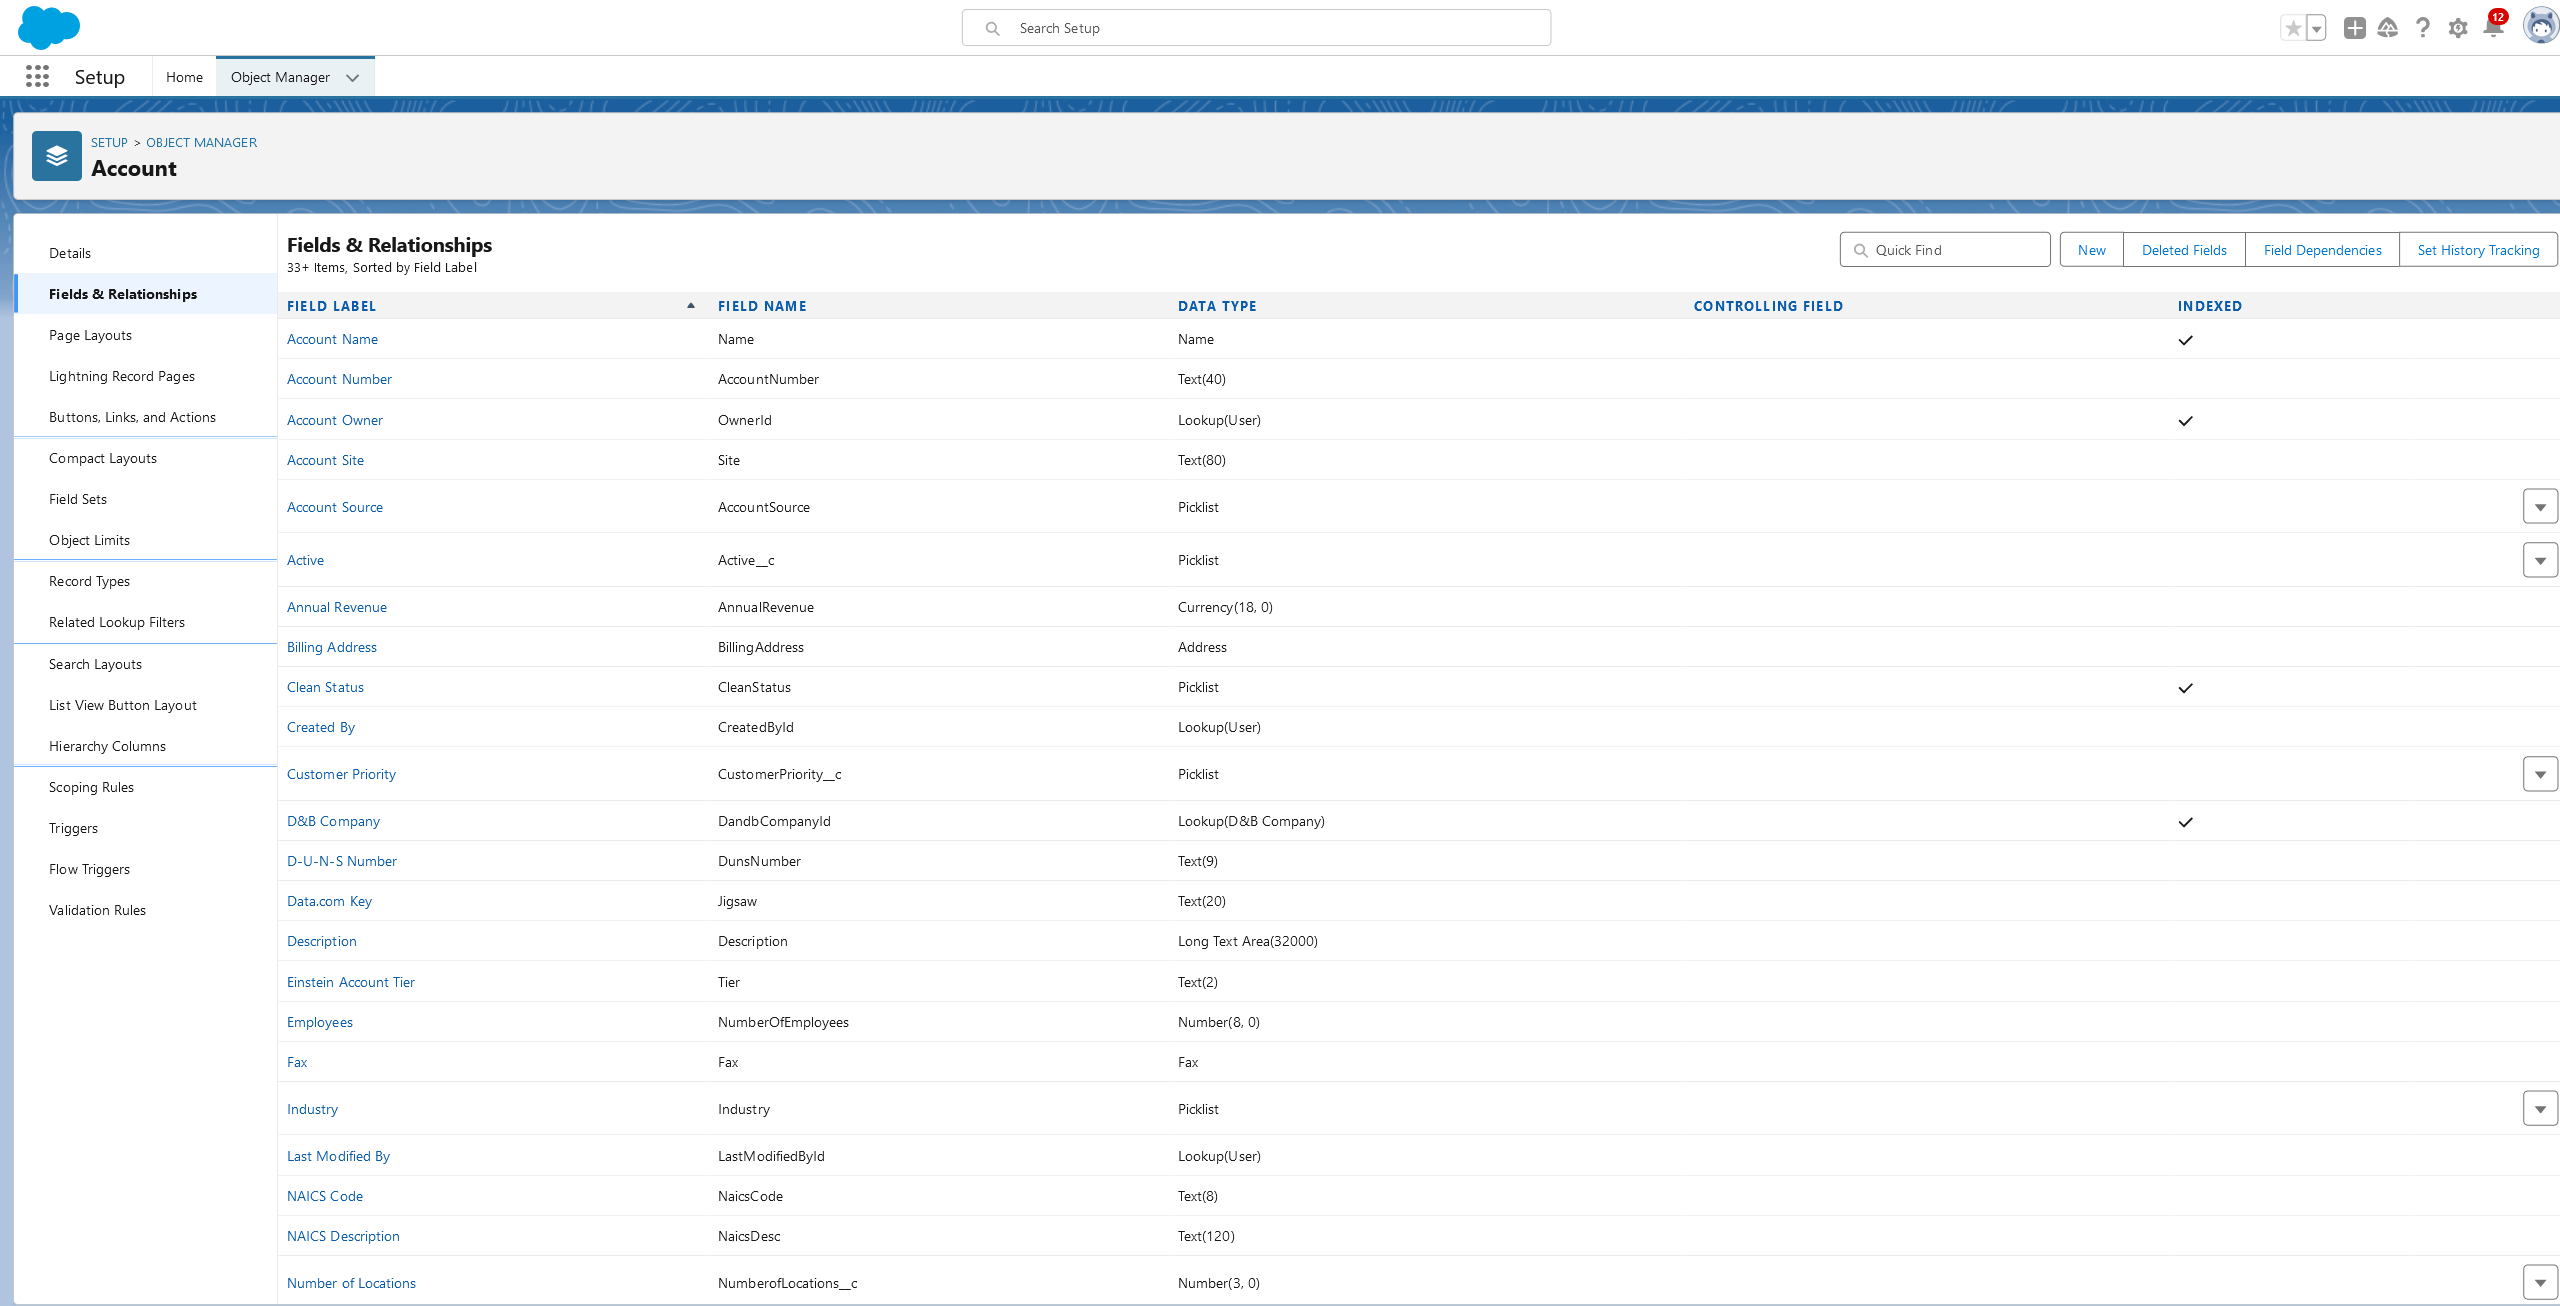
Within an Object Configuration for an Object (Object Manager → Clicking on an Object), select FIelds and Relationships to see all fields for an object. Think of Objects as database tables and Fields as columns. Click on any Field to view the Field information. If the field is editable, an Edit button will be visible at the top of the table.
¶ Types of Fields
¶ Data Types
Used only to store data on a certain record.
- Address: Allows users to perform searches to find an address and keeps track of the street, state/province, zip/postal code and country as saved.
- Checkbox: Acts as a boolean on Salesforce records, and can be set by Users as checked ("True") or unchecked ("False").
- Currency: Records a number with 15 digit precision, and formats the number as a Currency.
- Date, Time & Date/Time: Used to record a Date and/or Time, which can be selected by the user using a graphical element.
- Email: Records text entered by users, and ensures they follow the format of an email address before allowing the record to be saved. They cannot be longer than 80 characters.
- Geolocation: Records coordinates (latitude and longituted). This type counts as 3 fields agains your organization limits (2 for latitude and longitude, 1 for internal).
- Number: Records and Real number (numbers that are integers or decimal & negative, zero or positive) inputted by the user. The precision of this field is set at creation by the administrator.
- Percent: Records decimal numbers and interprets them as percentages. This type loses precision after 15 decimal places.
- Phone: Records any integral number entered by the user, and formats it as a phone number. It is limited to 40 characters.
- Picklist (single & multi-select): Records a selection, or set of selections made by the user. The values displayed on the picklist are either set on the Field Record, or can use a Global Value Set.
- Text & Text Areas: Records the string entered by the user either with no formatting (Text) or with specific formatting (Text Area, Text Area Long, Text Area Rich).
- URL: Records the string entered by the user, ensures it is a valid URL before allowing the record to be saved, and displays it as a hyperlink. It is limited to 255 characters.
¶ Calculated Types
Used to display values that are dynamic or set by the system.
- Auto Number: Automatically assigns a unique number to each record of an object. The template can be personalized with a prefix & postfix, which can be static text, or dynamic text (ex: year, month, day, ...).
- Formula: Automatically calculates its value based on the formula set by the administrator. It uses the Salesforce Formula Language, which includes functions, and can use other field's values.
- Roll-Up Summary: Can be set by the administrator to either automatically sum, count, average, find the minimum, or find the maximum of a specific child field's values of the children records for which the record the user is accessing the parent.
¶ Relational Types
Used to relate Records between each other
¶ Create Fields
While on the Fields and Relationships page for an Object, click New at the top right of the table to add a New field.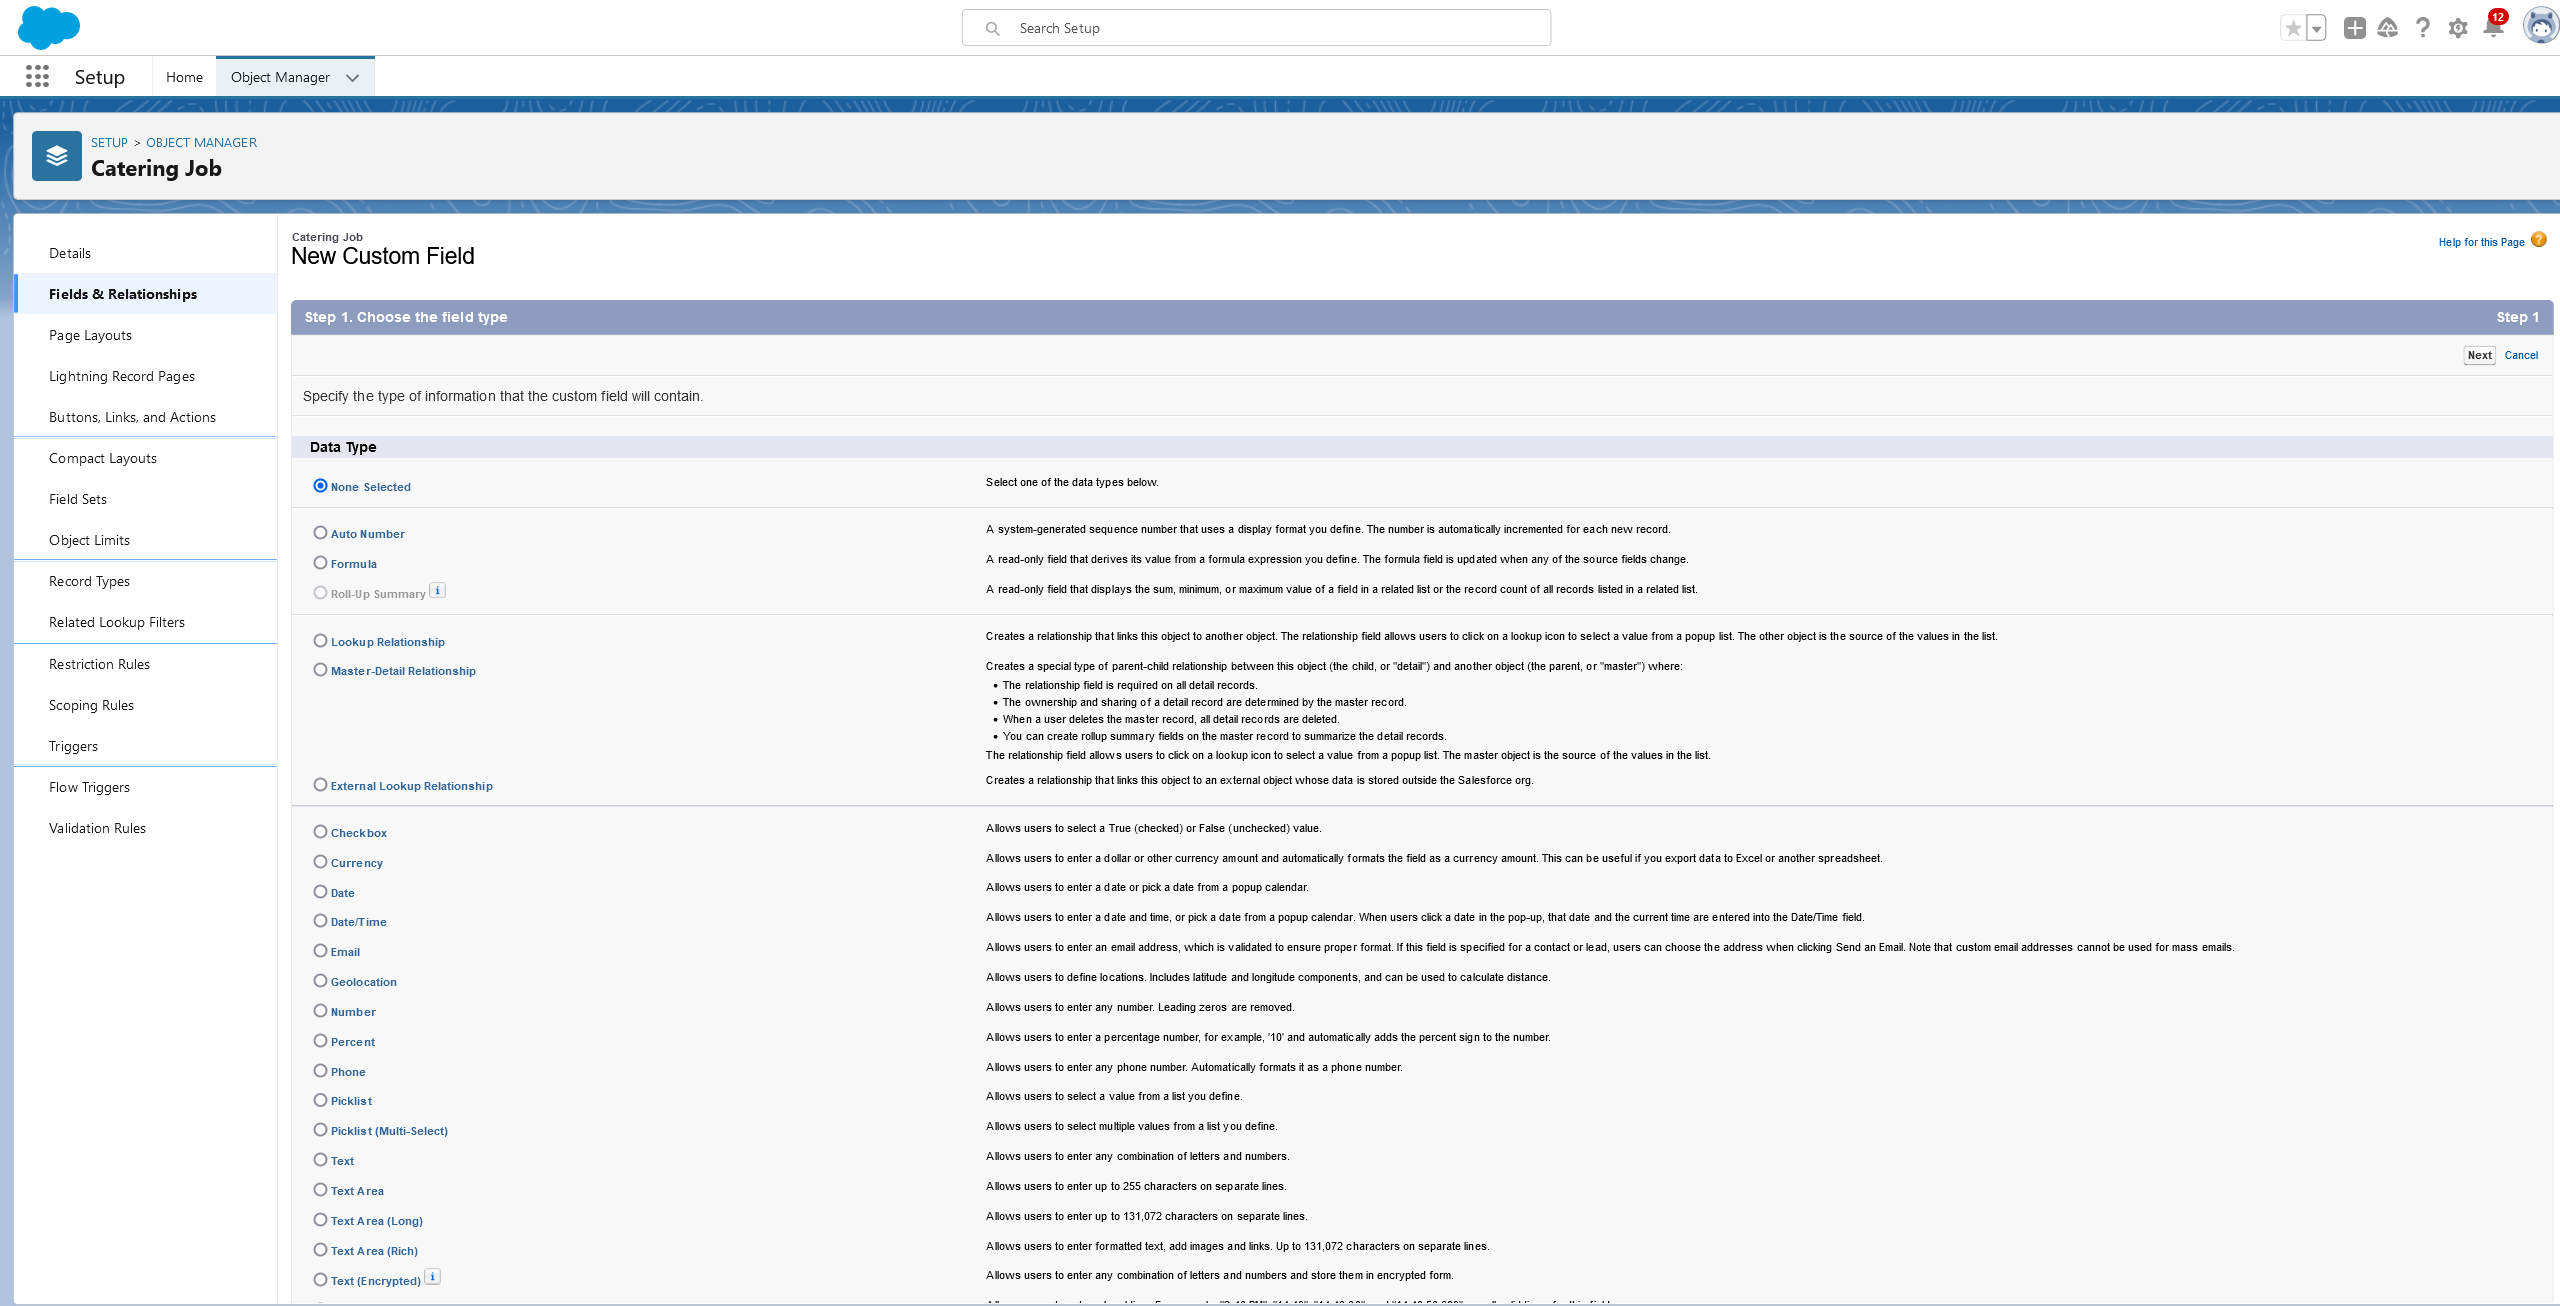
There are a lot of different data-types to choose from, but here are a few details to note:
- Lookup Relationship: The Lookup Relationship is important if the desired relationship to another object is not a parent or child. It just means that it is associated or related to the record you are adding.
- Master-Detail Relationship: This is essentially a parent-child relationship where one record can not exist without the other.
¶ Object Relationship (For lookup fields)
After selecting a Lookup field, click Next at the bottom. In the case of a Lookup Field, you will be asked to select an existing Object to create the relationship to.
¶ Field Details
Click Next again and you will see a screen to enter the labels and names for the lookup field.
- Field Label: What users see on the Salesforce Interface
- Field Name: What developers see when using the Salesforce API
- Description: Internal description to understand the purpose of the field
- Help Text: Visual text under the field to help the user understand how to use the field
¶ Field-Level Security
Click Next again to edit the Field-Level Security. This page shows all of the Profiles in your org and which profiles have the permission to view and/or edit your field.
Note: If your field is required, all of the profiles will be forced to have Visible access.
¶ Page Layouts
Click Next again to add the field to page layouts. If you have not created a page layout for your new object, a default layout will automatically be selected. The layout will be named "[Object Label] Layout".
Once you are out of steps, click Save to add the Field to your object.